Installing qBittorrent: Torrenting Made Easy!
qBittorrent in Proxmox LXC!

In the previous article, we delved into the step-by-step process of mounting an NFS share in a Proxmox LXC for our Home Lab.
In this article, we’ll turn our spotlight to qBittorrent — A powerful and efficient BitTorrent client.
What is qBittorrent?
qBittorrent is a free, open-source, and cross-platform BitTorrent client. It is a powerful tool for downloading and managing torrents — a popular method for distributing files over the internet. BitTorrent is a peer-to-peer file-sharing protocol, and qBittorrent provides users with a user-friendly interface to interact with this protocol.
Key features of qBittorrent include:
- User-Friendly Interface
- Cross-Platform Compatibility
- Efficient Torrent Management
- Low Resource Footprint
- Web Interface for Remote Access
- Open Source
qBittorrent provides a comprehensive solution for those looking to engage in torrenting activities. It’s a popular choice among users who prefer open-source.
Disclaimer: Legal and Ethical Considerations
Before proceeding with the installation and use of qBittorrent or any other torrenting software, it’s crucial to be aware of legal and ethical standards. Torrenting copyrighted material without proper authorization is illegal in many jurisdictions and can lead to severe consequences.
This guide is intended solely for educational purposes and assumes that users will adhere to all applicable laws and regulations. The authors and publishers of this guide do not endorse or encourage any illegal or unethical activities, including the unauthorized sharing or downloading of copyrighted material.
Steps to install qBittorrent:
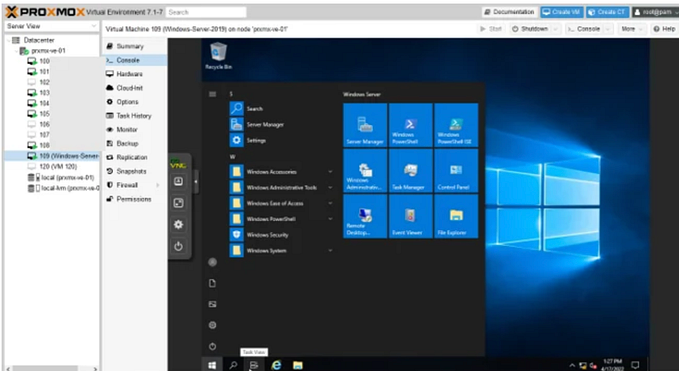
- Before proceeding we need a few information to be obtained which we’ll be using in the further steps. We can quickly fire up a terminal and connect to the LXC via SSH or connect via Proxmox Console.
- We need to find out the Process User ID (PUID) and Process Group ID (PGID) of the user from which we’ll be deploying this stack. These variables specify the user and group ownership for processes running inside the Docker containers.
- In our case, these values are used to ensure that the files created or modified by qBittorrent running in the container are owned by the specific user and group on the LXC. We can type in the below command to find the same.
id <username>Note: Replace <username> with the name of the user from which the stack will be deployed

- Now, we’ll be using Portainer Stack to install qBittorrent in our Home Lab. First, let us log in to our Portainer instance and then head to our local docker instance by clicking on the local option.

- Here we can use the Stack option to deploy our qBittorrent instance using our docker-compose file. Let’s click on the Stacks option.
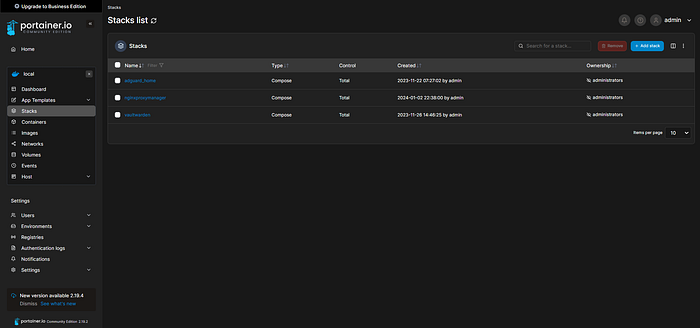
- We can click on the Add Stack button on the top right to create a new stack.
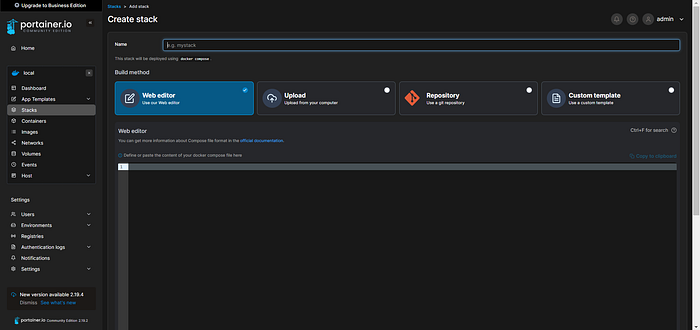
- We can give the name of the stack and then just copy and paste the below docker-compose file of our qBittorrent instance. Feel free to make changes to the file based on your needs.
version: '3.8'
services:
  qbittorrent:
    image: lscr.io/linuxserver/qbittorrent:latest
    container_name: qbittorrent
    environment:
      - PUID=1000
      - PGID=1000
      - TZ=Asia/Kolkata
      - WEBUI_PORT=8080
    volumes:
      - qbt-config:/config
      - /home/admin/NFS/Downloads:/downloads
    ports:
      - 8080:8080
      - 6881:6881
      - 6881:6881/udp
    restart: always

volumes:
  qbt-config:
Note: Replace the IDs of PUID, and PGID with the IDs of your user. TZ denotes time zone which can also be changed based on your region
- In the above compose file, we will be creating a volume to store all our qBittorrent configuration files.
- Also, we need a location to store all our downloaded files. For that, we’ll be using the location of the folder in which we mounted our NFS share in our previous article.
- As we are using the NFS share folder, we’ll be storing all our downloaded files in our TrueNAS instance directly instead of storing them locally on our LXC.
Note: Make sure to replace the download location based on your need

- Once done we can click on the Deploy the Stack button to deploy our qBittorrent instance.

- We can see that the stack has been successfully created. On viewing it, we can see that our qBittorrent has been successfully installed and the container has started running.
We have successfully installed the qBittorrent instance on our Home Lab. We now can check out our installation.
Configuring qBittorrent:
- First, we need to head to the qBittorent login page. By default, the Remote Login UI would reside on port 8080. We can type in the IP Address:8080 to open the same.
Note: In the docker-compose file, we have used port 8080. If this value is changed in the file then use the port number that you have given
- Since we have already installed and configured Nginx Proxy Manager, we can create a proxy host for qBittorent using the IP and the port number.
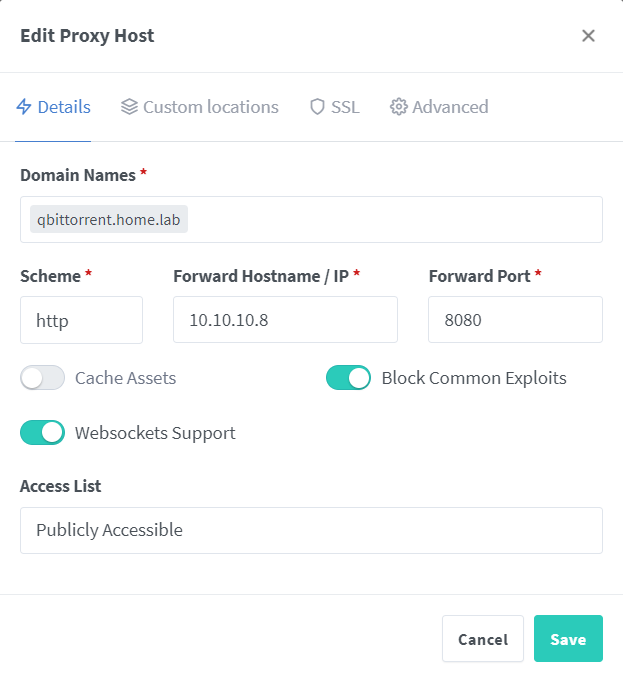
- Now we can type in the domain name to open our qBittorrent instance.
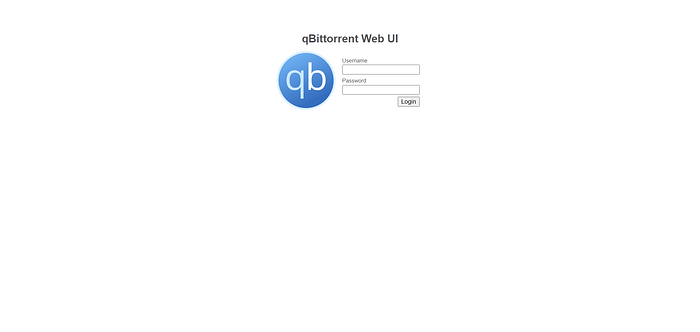
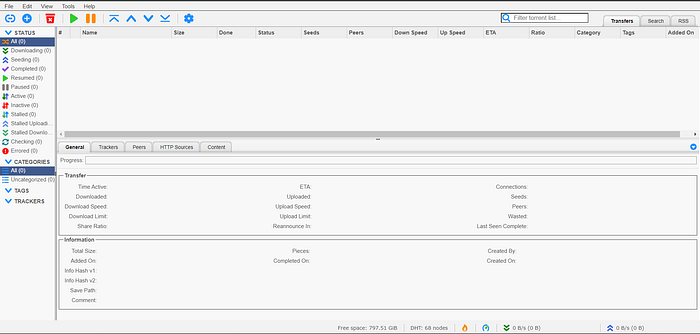
- We’ll be greeted with the above login screen.
Note: Username: admin
The temporary password is present in the container logs
- For the temporary password, we can open our Portainer instance and click on the containers option.
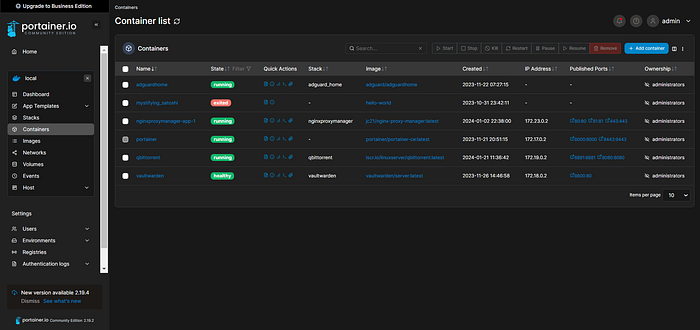
- Here, we can click on our qBittorrent instance to open it.
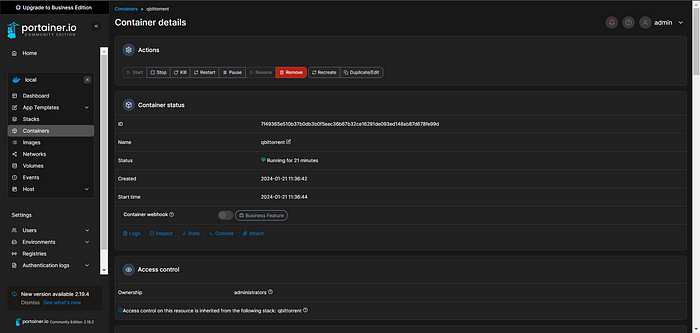
- Now, we can click on the logs option to open the container logs.
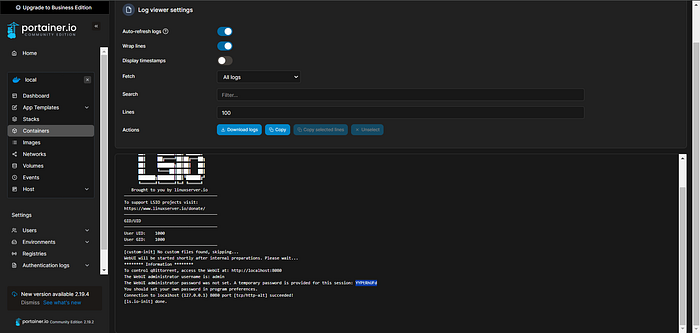
- Here we can find the temporary password for our qBittorrent instance. We can type in the same to log in.
- We now need to set a password so that we can use this password to log in instead of checking the container logs for a temporary password when the container restarts to log in.
- We can click on the Tools -> Options button to open the settings page.

- Now, we can head to the Web UI tab to change the password.
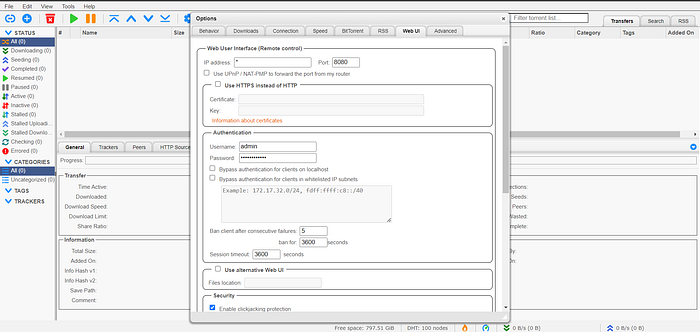
- We can give a password under the Authentication section to assign a password for our qBittorrent instance login and then click on the Save button to save the changes.
- We now will be able to log in using the new username and password that we just changed.
We have now successfully installed and configured our qBittorrent instance. We now will be able to download our torrent files directly to our NAS easily and conveniently.
In this article, we have explored qBittorrent and went into the step-by-step process of deploying the same in our Home Lab.
In the next article, we will be looking into another service that we will be deploying in our Home Lab. Stay tuned for more detailed instructions on expanding our Home Labbing capabilities.
Happy Homelabbing!!!
Originally published on: https://harish2k01.in/installing-qbittorrent-torrenting-made-easy/