Creating a LXC in Proxmox
Linux CT in Proxmox!

In the past articles, we have successfully installed Proxmox on our Home Server system and have also installed and configured TrueNAS as our storage solution. We are now ready to start deploying services in our Home Lab. The plan here is that we will be deploying the services as a docker container.
The reason for the docker approach is that each container in a docker runs in isolation. Also, we can put together a docker-compose file for each service separately, and is easier to upgrade the services and for management as well. Also if any of the container goes down or gets corrupted it wouldn’t affect the system or other containers. Hence instead of installing the services on bare metal, we are going to proceed with the docker approach.
Also, we will be installing docker in a LXC, also called Linux Containers, instead of going with a VM. LXC has many advantages over a VM. The first and the most important is that a LXC uses very less resources when compared to a VM in Proxmox. Along with it, it has faster boot times, better performance for Linux-based workloads, uses the host resources efficiently, and makes it easier to take backups.
With that, enough of the introduction, and let’s get started!
Creating a LXC:
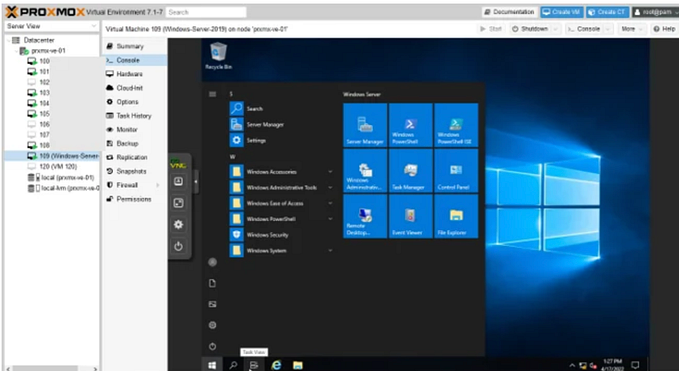
- To create a LXC first we need the installation file or the template. We can download it easily within our proxmox environment. Hop into the proxmox login. Once logged in, head over to the ‘local’ storage on the left menu bar.
- Now let us click on the ‘CT Templates’ option. We can see a Templates button on the top. Let us click on it. Upon clicking the button, we can now see a popup showing the list of all the templates.

- We can select the preferred variant here. I’ll go with the Debian 12 Standard. We can just click on the template and then click on the Download button.
- Another popup will open and the template will begin to download. Once the download is completed ‘TASK OK’ will be shown in the popup and we can close it then.

- We can now proceed with the LXC creation. Click on the ‘Create CT’ button. We need to give in the hostname and the password for the ‘root’ account. I’ll give the hostname as ‘LXC1’ and type in my password. We can click on next once done.

- Now in the template screen, we can select the template that we just downloaded and then click on next.

- We can select the size of the disk now. I’ll leave it at the default 8 GB. We can click on next once done.

- We now need to select the number of CPU cores. I’ll leave mine at 1 core. We can input the core based on our usage and the number of available cores in the host CPU. It would differ from system to system based on the CPU used. We can click on next once done.

- For the memory, I’ll increase it to 1 GB which would be 1024 MB. Again we can change it based on our usage and preference. We can click on the next button upon configuring the same.

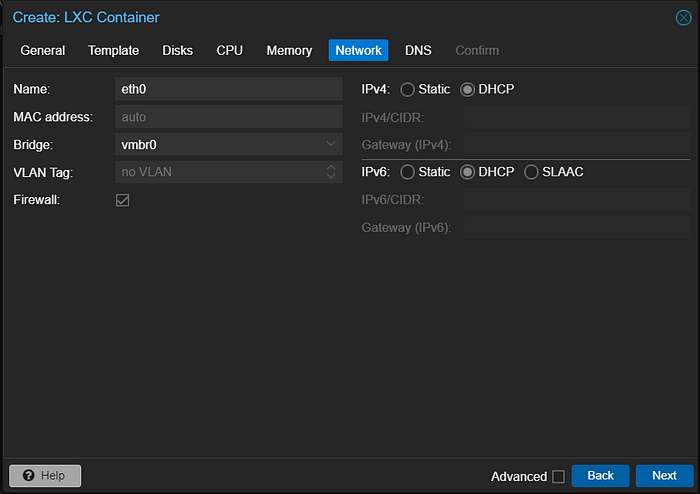
- For the network configuration, we can change both IPV4 and IPV6 to DHCP so that the IP address will be allocated automatically. If not we can also configure it to use static IP and then click on next once done.
- For the DNS setting, we can leave it empty. It will automatically use the DNS setting configured for the Proxmox. If we need to specify it explicitly we can do the same and then click on next once done.
- We can go through the configuration of the LXC here and confirm the same. If any changes are required then we can go back and forth to make the required changes. Once done we can click on the Finish button and the LXC will be created.

- Do not start the LXC yet. We need to make one more change before starting it. After the LXC gets created click on the LXC and head to the ‘Options’ section.

- Here, double-click on the Features option, and a popup will open. We need to enable the keyctl, Nesting, and FUSE features. We can click on the OK button once we enable the features.

- Now we can turn on the LXC by clicking the Start button on the top.
Configuring the LXC:
We need to make a few configuration changes to the LXC before we can start to use it fully. By default, the SSH would be off. If we need to access the LXC via SSH instead of Proxmox Console we need to turn it on first.
- Quickly, we can click on the LXC and go the the console option. It would ask for the username. We can provide the username as ‘root’. Now for the password we need to provide the password which we entered during the creation of our LXC. I’ll provide the password for mine and hit Enter once done. We will be logged in.

- First, let us install the sudo package. We can type the below command to install sudo. We do not need sudo since we are already logged in and using the LXC as the root user. But for convenience, I’m installing the same.
apt-get install sudo- If you see any errors during this, mostly it would be a network issue. In such a case, we need to check the DNS and Network settings of the LXC if it has been properly configured.

- We can check the current status of the SSH using the below command.
sudo systemctl status ssh
- Here we can see that the SSH service is active. In case the SSH service is not active, we can use the bel0w command to turn the SSH service on for the LXC.
sudo service ssh start- Also in order to enable the SSH service on boot, we can use the below command so that every time the LXC gets turned on or rebooted the SSH service would also start along with it.
sudo systemctl enable ssh
- Now we have successfully enabled the SSH service in the LXC. But still, we won’t be able to login to the ‘root’ user via SSH as it is disabled by default. If we need the same, then we need to make one additional change.
Note: Enabling SSH for the root user is not recommended for security reasons.
# Navigate to the below file
nano /etc/ssh/sshd_config- Now in this file add the line ‘PermitRootLogin yes’ and then save it. To save the file press the Ctrl + X keys on the keyboard. Now click on Y and then Enter to save the file.

- In order for the changes to be reflected, we need to restart the SSH service. We can type in the below command for the same.
sudo /etc/init.d/ssh restart- We will now be successfully able to log in to the LXC via SSH using the ‘root’ user.
Bonus Tip: We can use the below command to configure the timezone for the LXC.
dpkg-reconfigure tzdataIn this article, we have successfully created Debian LXC in Proxmox. We have also successfully enabled the SSH service and the SSH for the ‘root’ user as well and have made the LXC ready for the docker installation.
In the next article, we will dive deeper into the Installation of Docker in a Proxmox LXC. Stay tuned for more detailed instructions on expanding our Home Labbing capabilities.
Happy Homelabbing!!!
Originally published on: https://harish2k01.in/creating-a-lxc-in-proxmox/